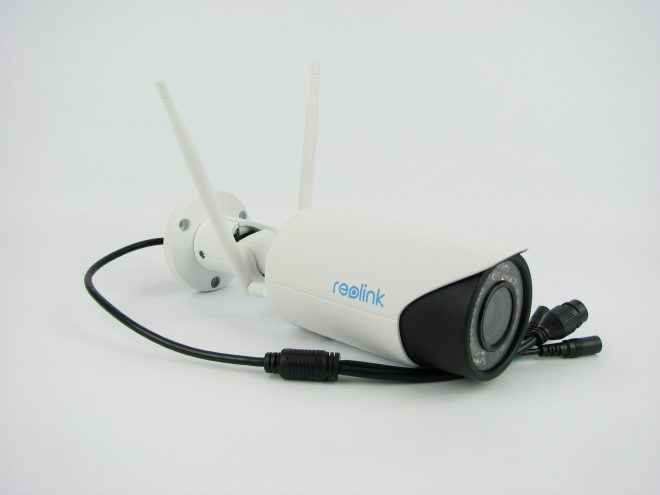
The Reolink RLC-411WS is a high quality wireless outdoor security camera with some great features not found on other cameras. This camera was my top pick when I recently went looking for the best outdoor wireless security cameras, so I purchased one and have been using it for a few weeks now. It captures video up to 4 megapixels at 30 frames per second and has a motorized varifocal lens with automatic focus that’s remotely adjustable from 2.8 to 12mm, giving you a horizontal viewing angle anywhere from 36 to 100 degrees. It also has wireless connectivity supporting two transmit and two receive streams on 2.4 or 5.8 GHz. Click on any of the images for a full resolution version.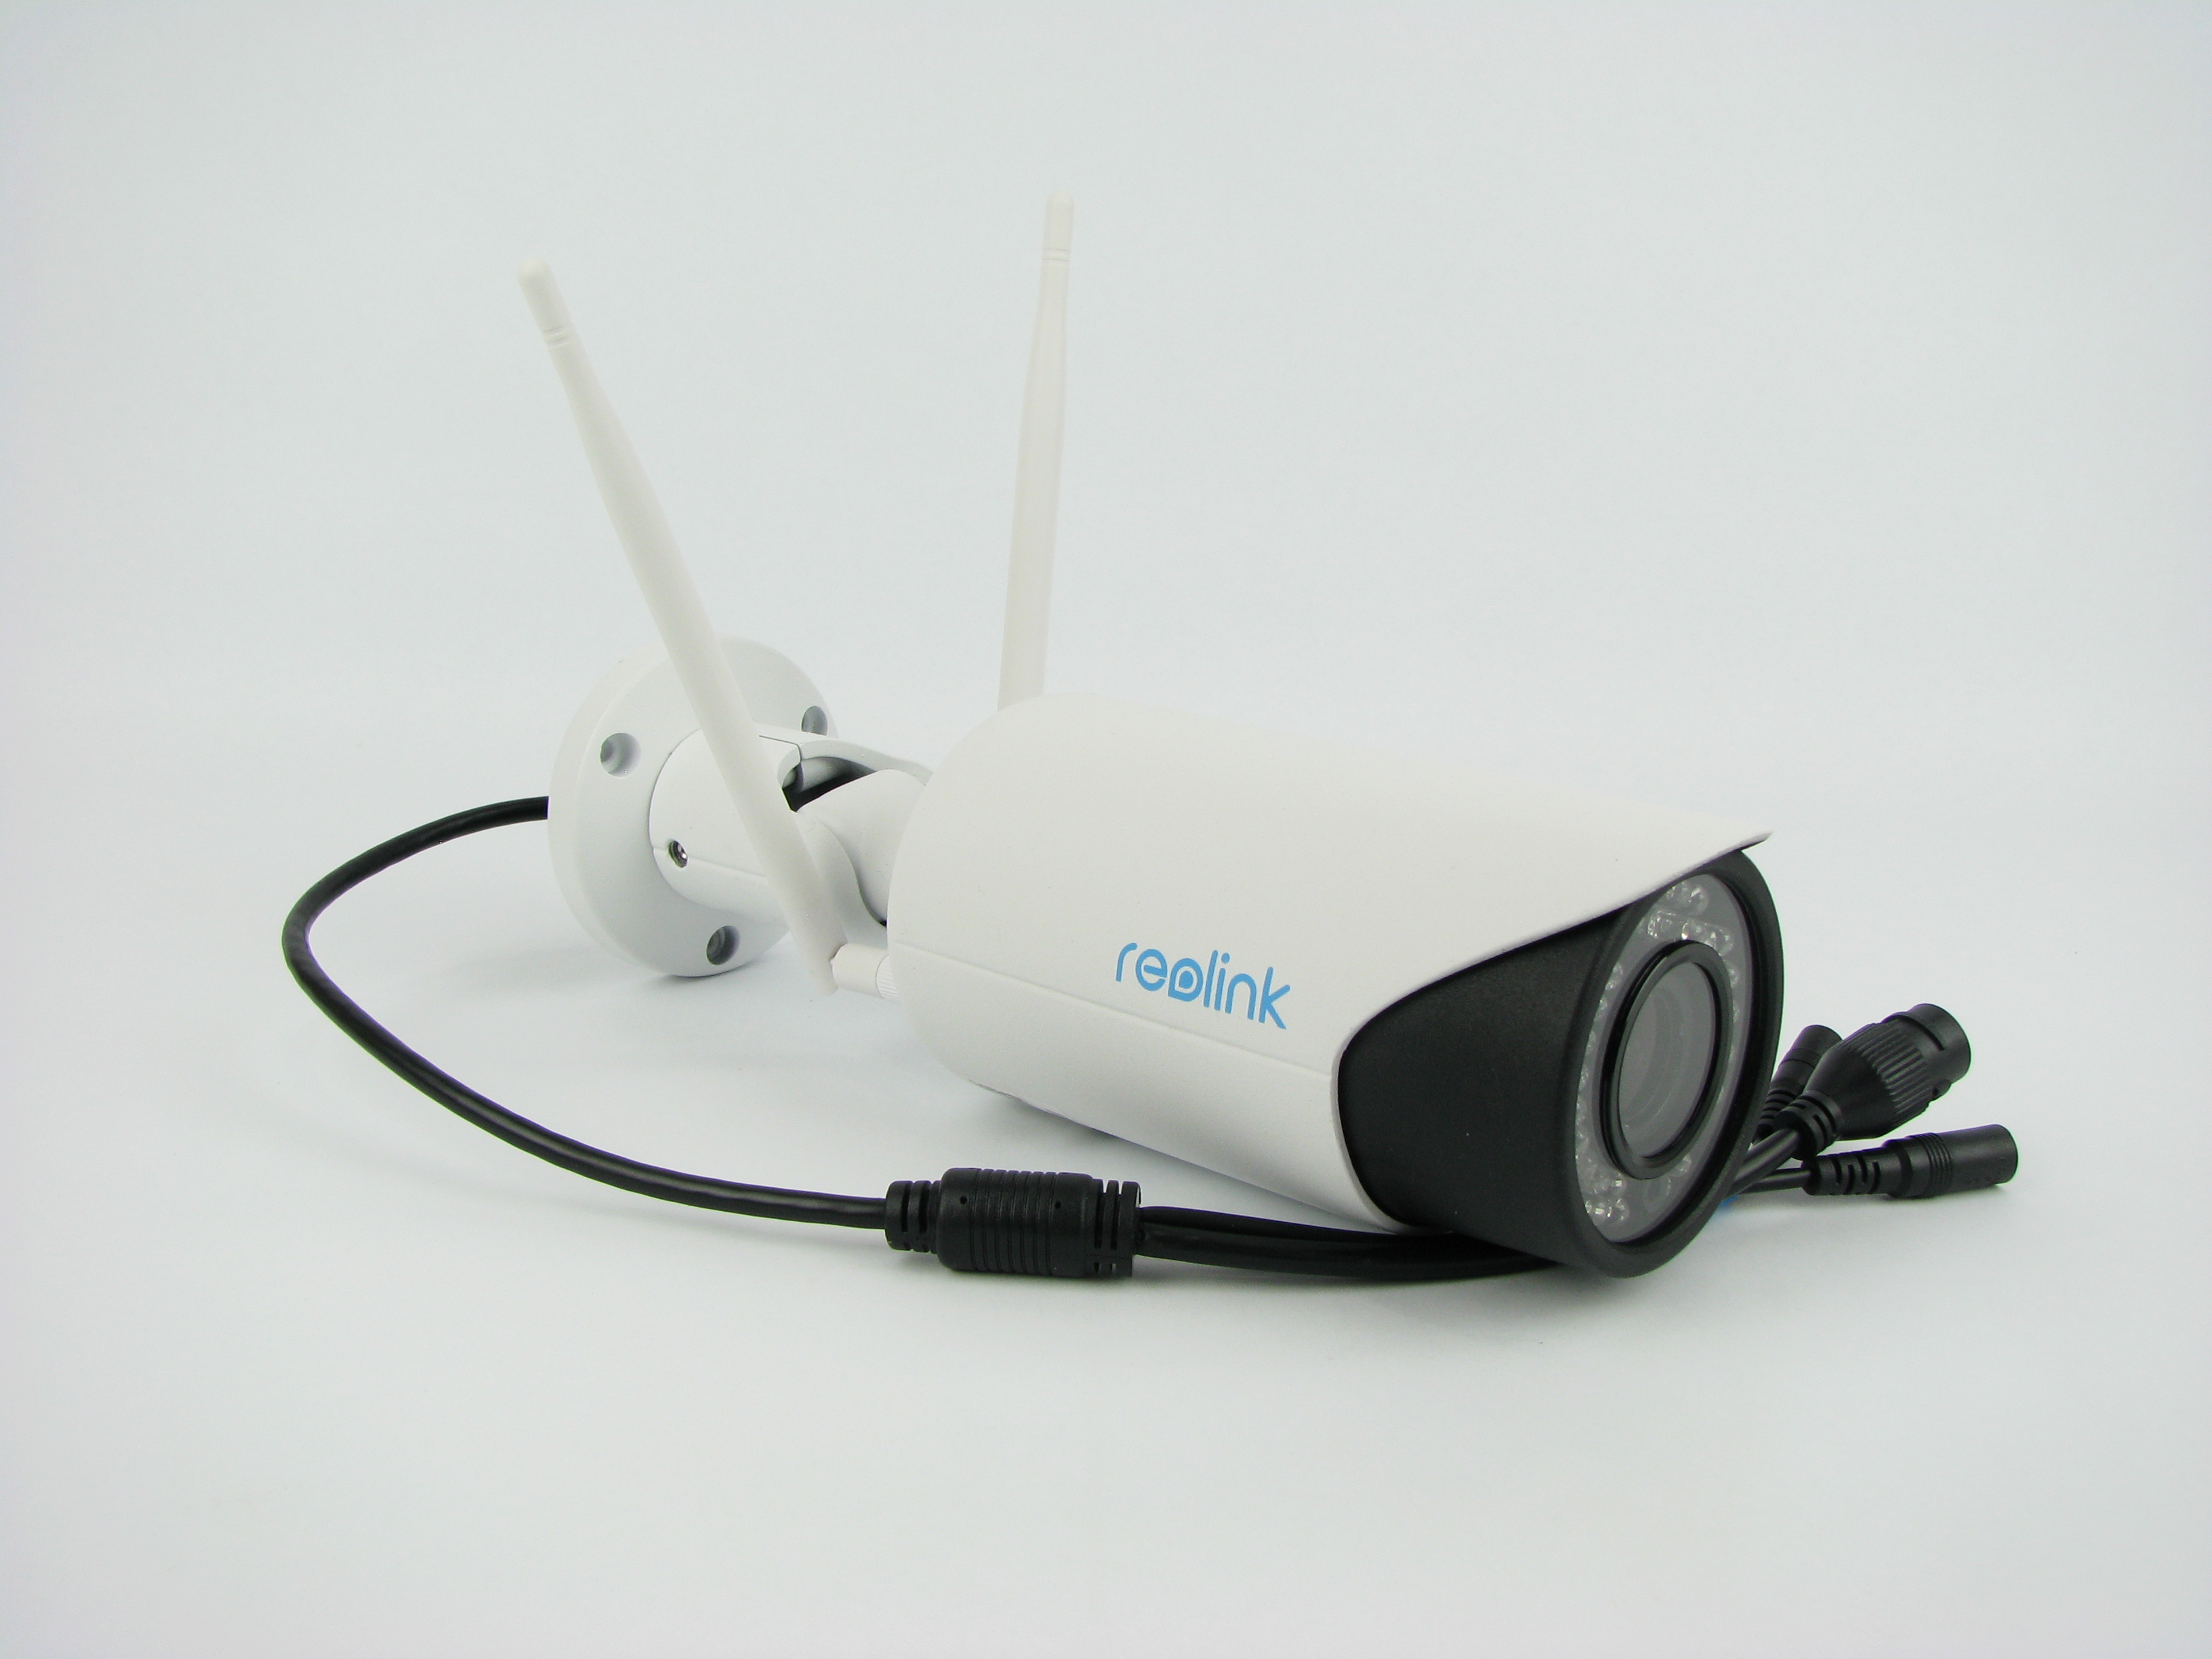
Check the latest price and customer reviews on Amazon.com
What’s included?
The camera comes in a brown box with everything you need to get it installed and running.
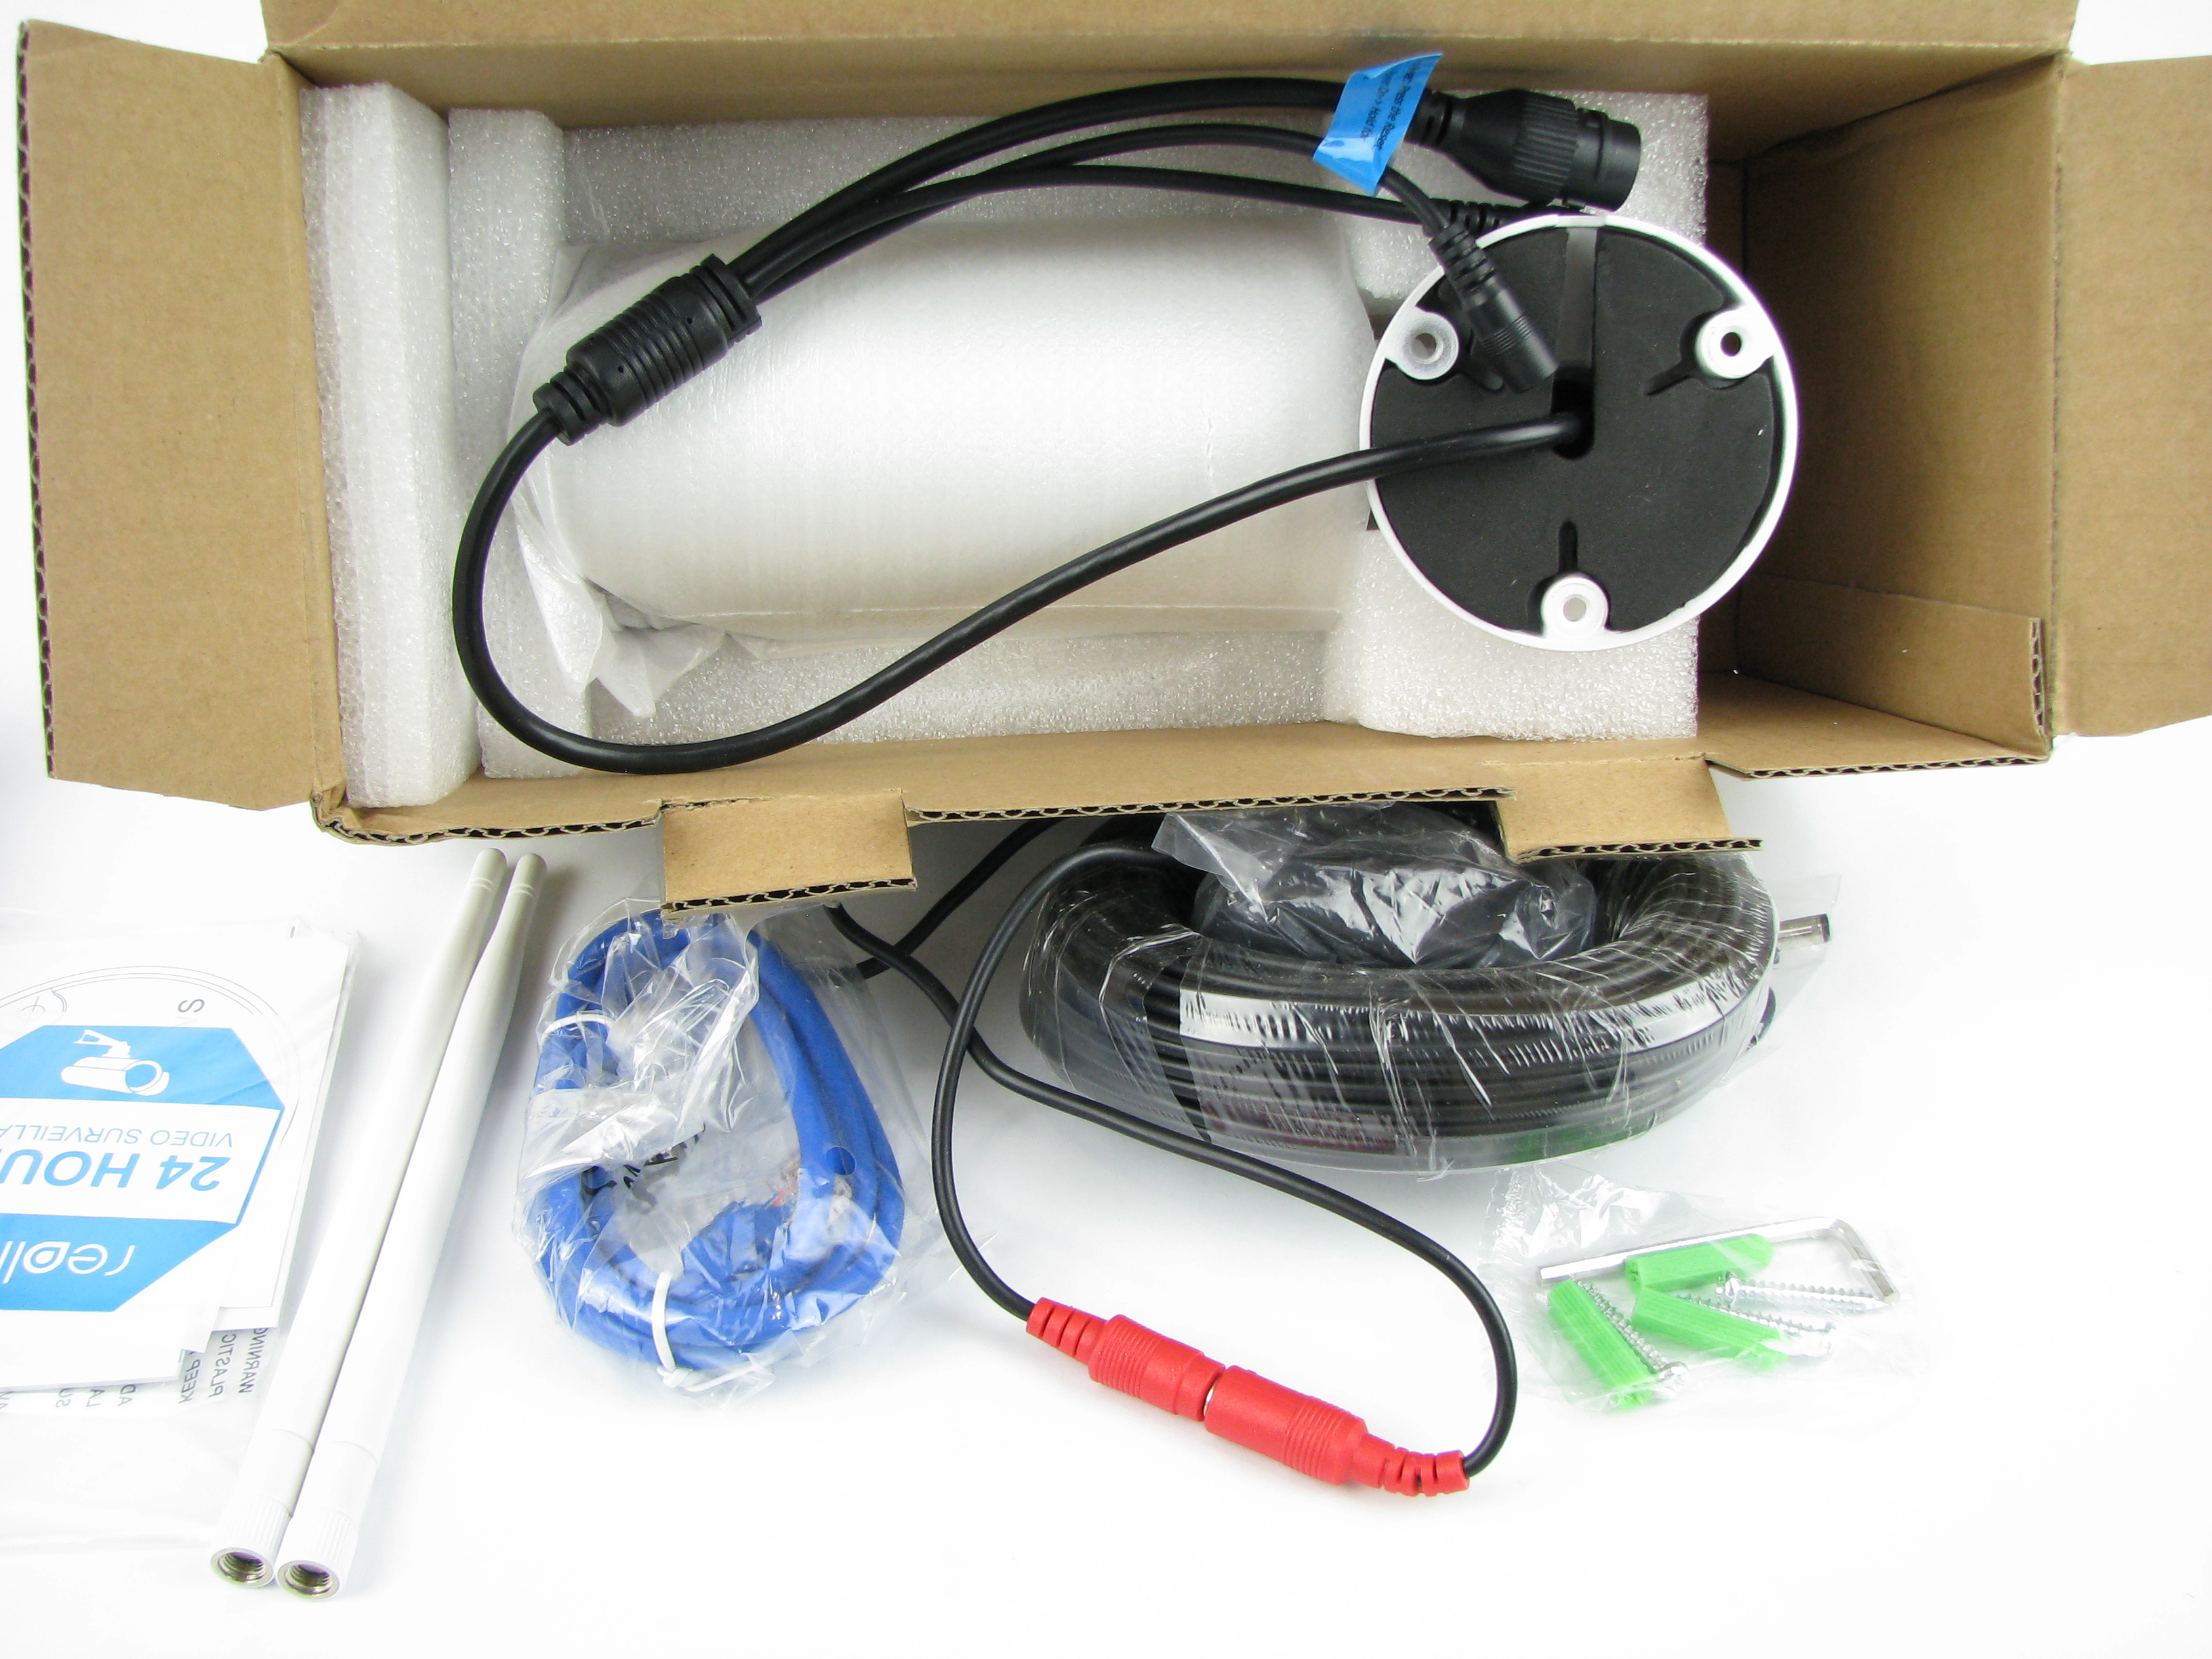
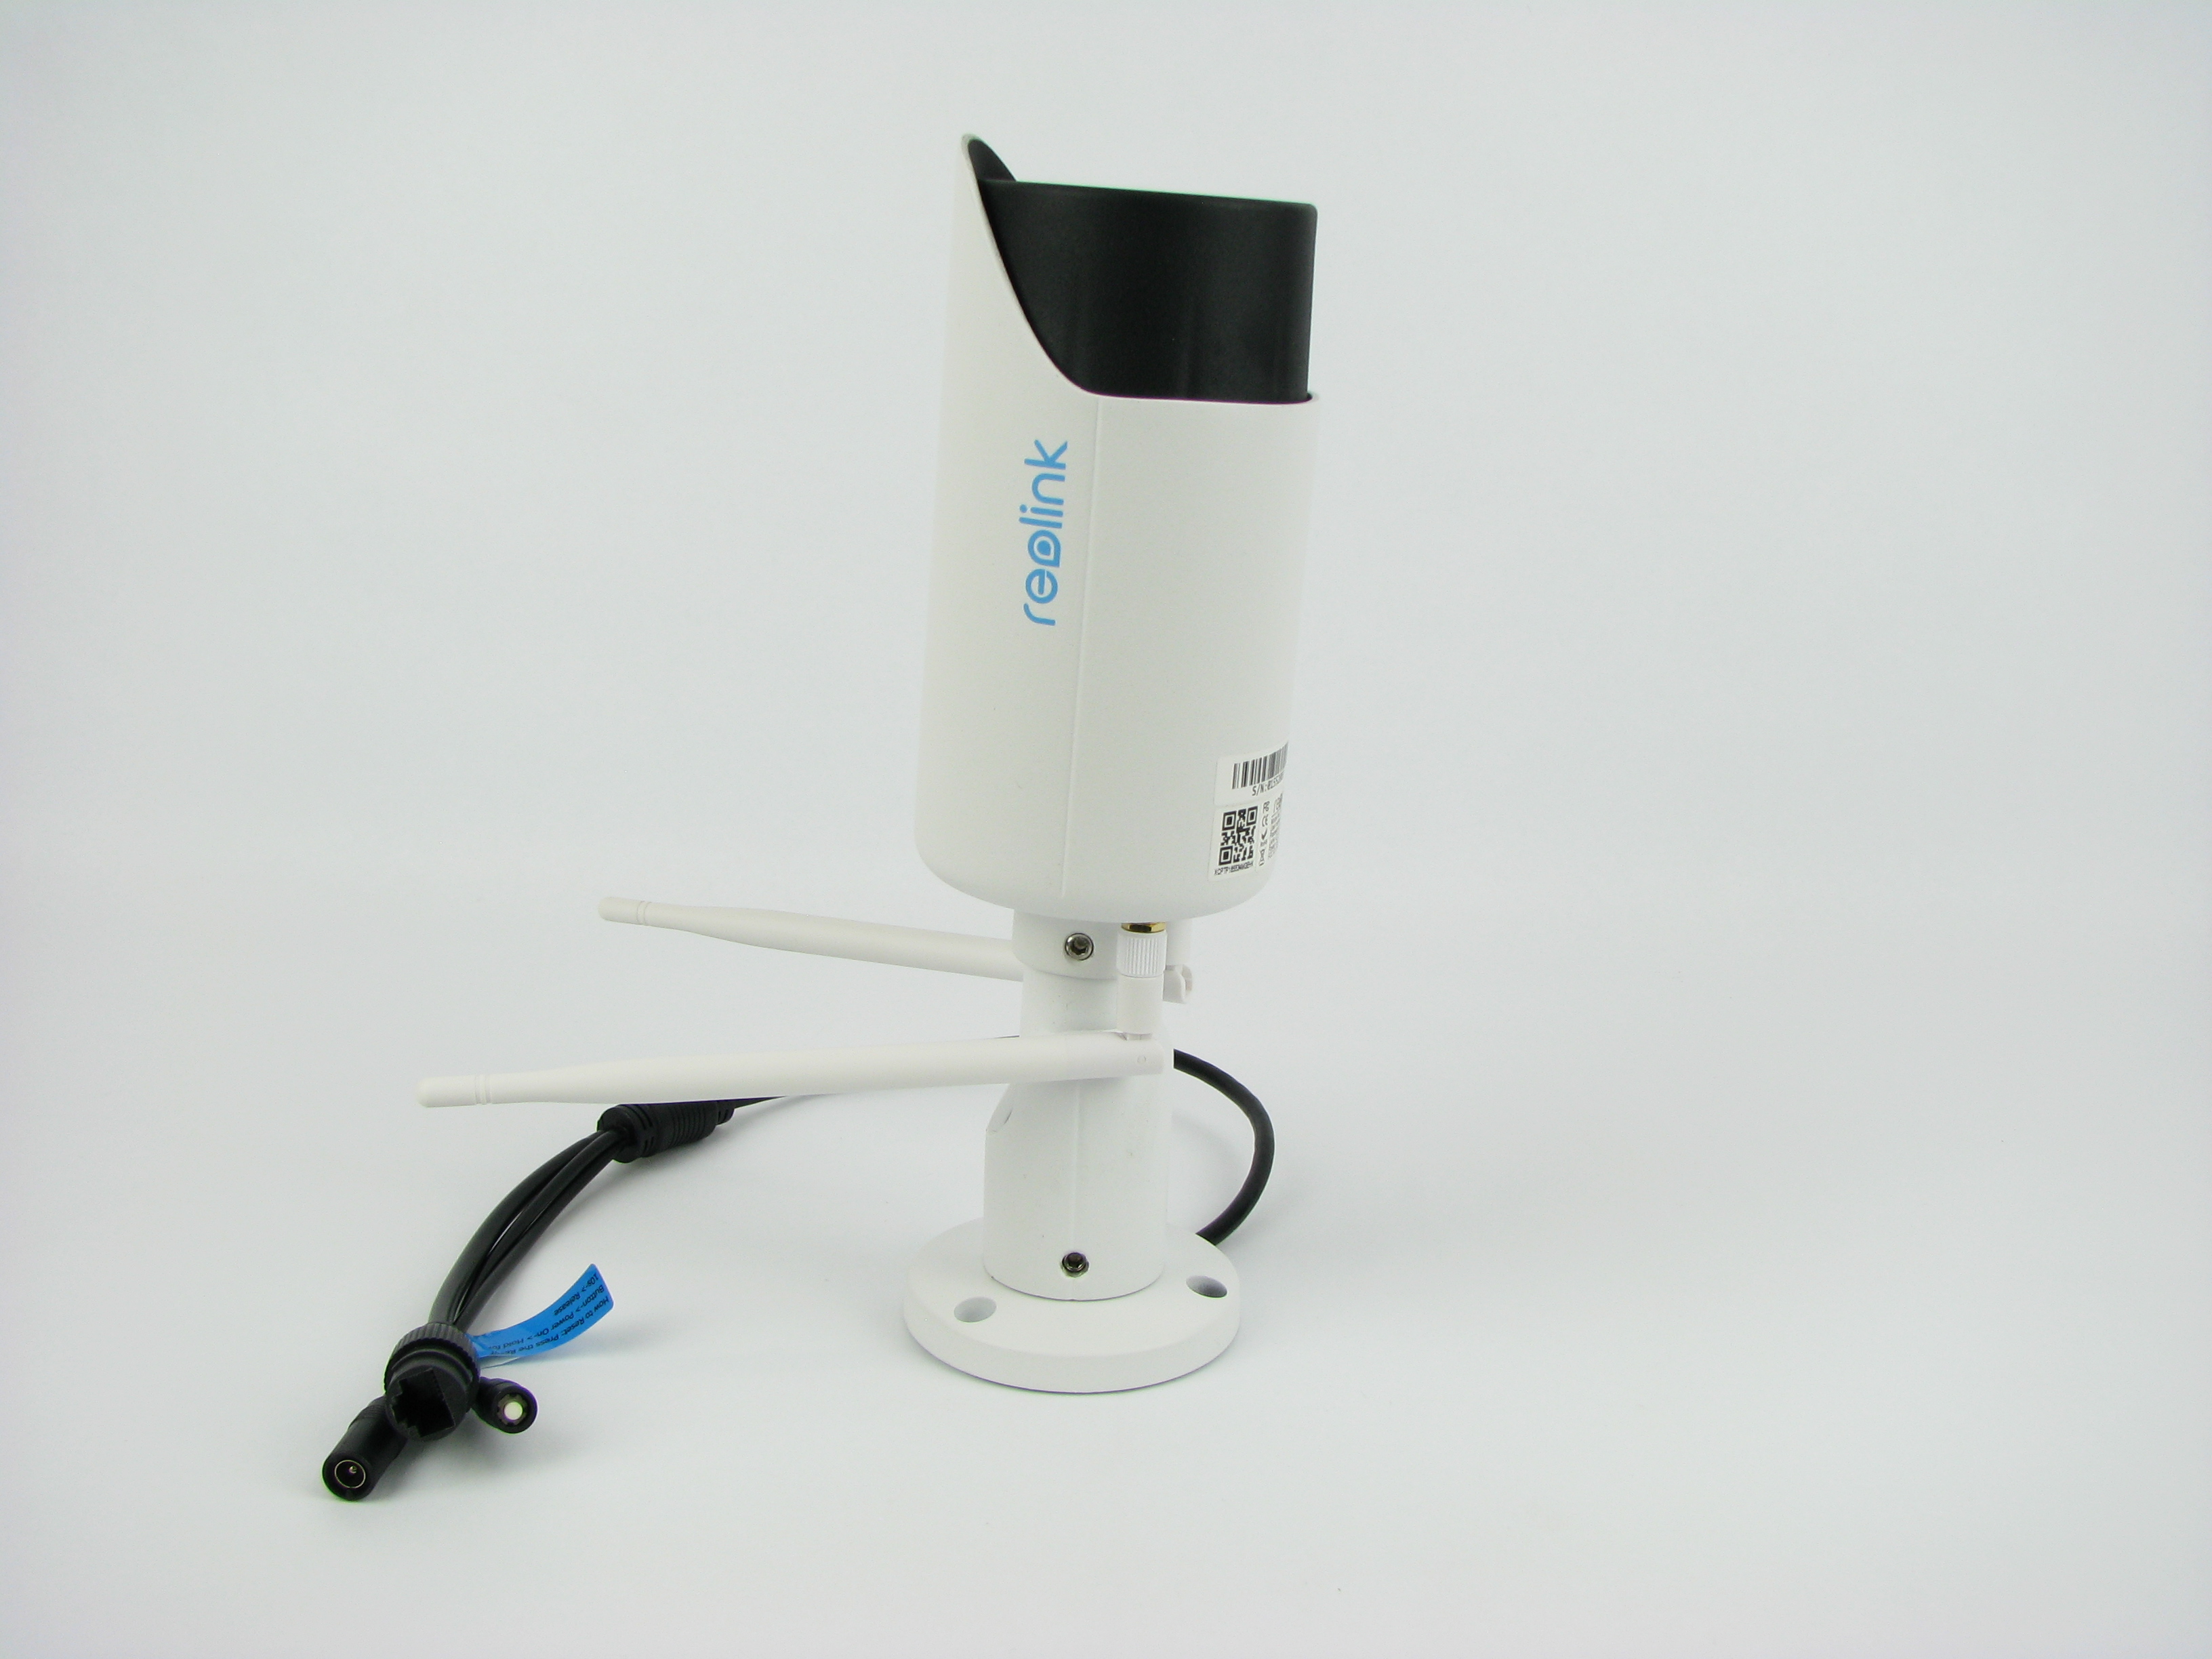
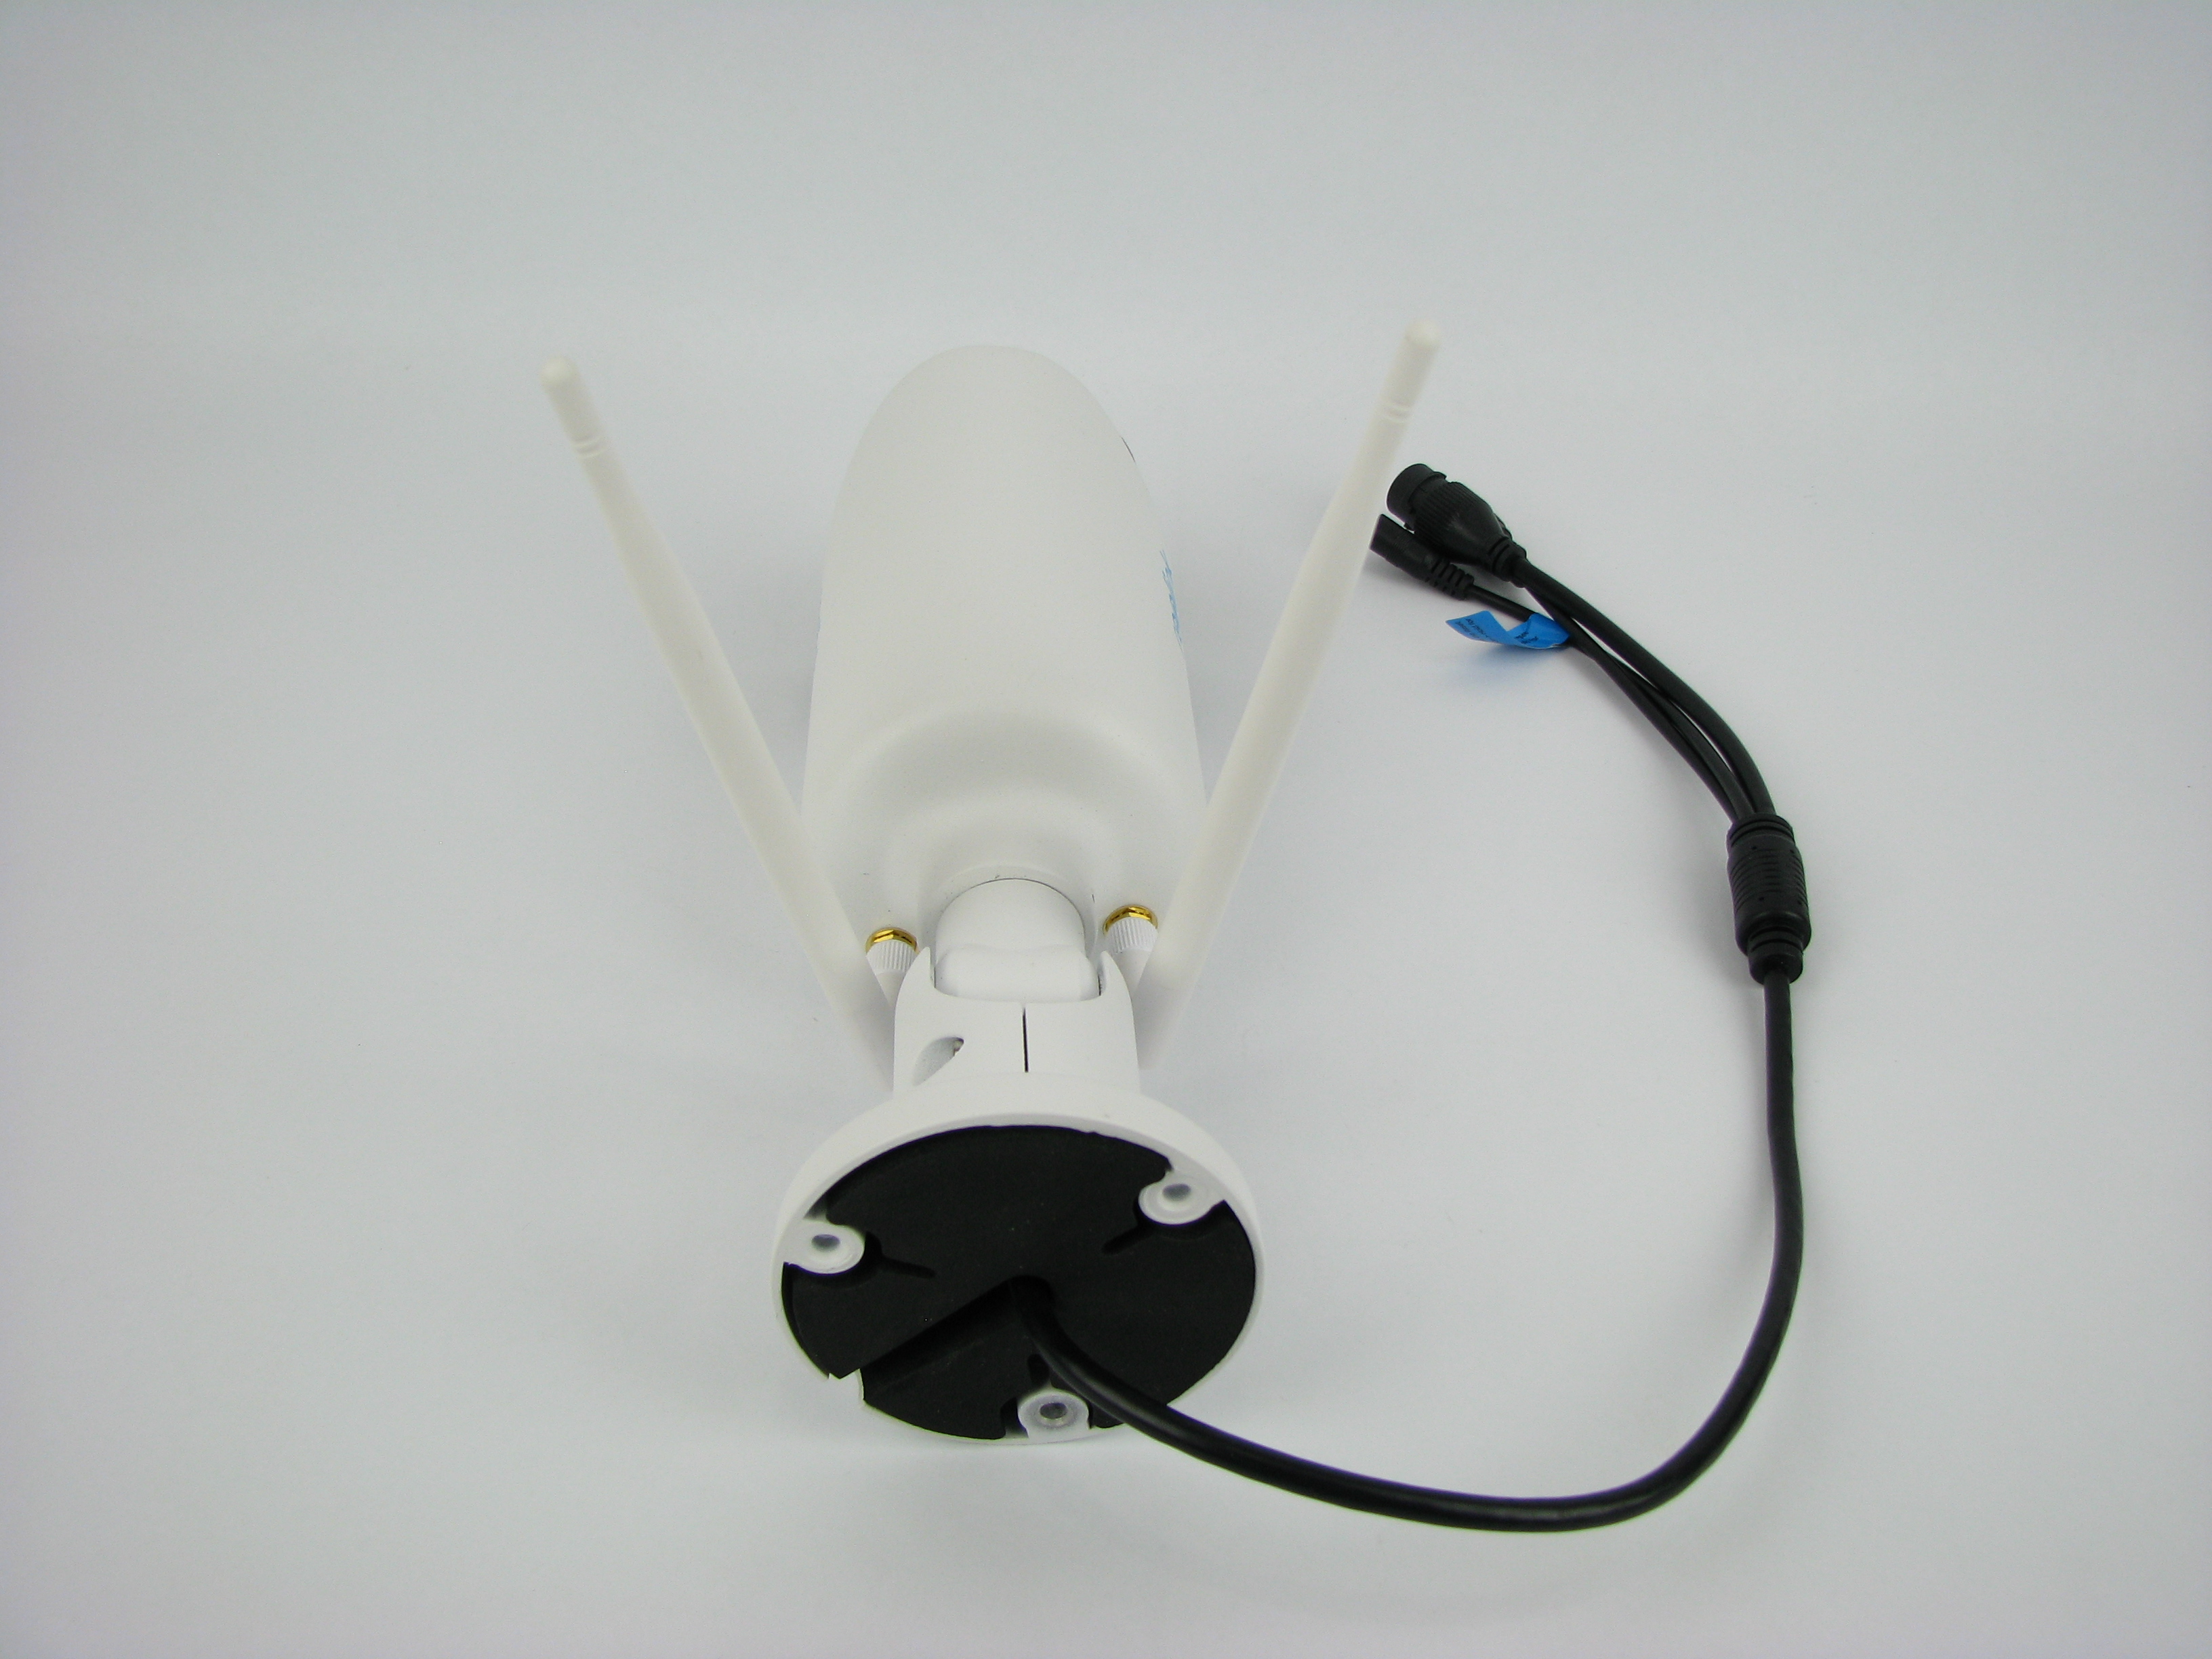
- Camera with two antennas
- 12 Volt DC 1 Amp power adapter with 4′ cord
- 60′ DC power extension cable
- Short Ethernet patch cable for configuration
- Three screws and plastic anchors for mounting
- Allen wrench for adjustments
- Mounting template
- Software CD
- Quick start guide
- Warning sticker
Initial setup and software
As with any piece of equipment, it’s best to get it configured and tested on the bench in front of you before installing it in a permanent location. Simply screw on the included antennas with their RP-SMA connectors, and power up the camera using the included 12 Volt power adapter. Like most wireless cameras, this does not support PoE. It has a 2.1 x 5.5mm power connector and requires 12 Volts DC ±11%. That’s all there is to do to get it up and running.
At this point you have several options for connectivity and software. The quick start guide covers the initial software setup and configuration, and it’s very easy to do.
Clients Available:
- Android and iOS mobile device applications
- Mac application
- Windows application
- Web browser using Adobe Flash Player
You can connect your Android or iOS mobile device to the camera in P2P (peer-to-peer) mode if you want, allowing them to work together without any other network infrastructure. I tried that first with my Nexus 5x smartphone and it worked well, and it’s an easy way to configure the camera without connecting an Ethernet cable at all. While in P2P mode I setup the camera to connect to my WiFi, and then used that from there on out.
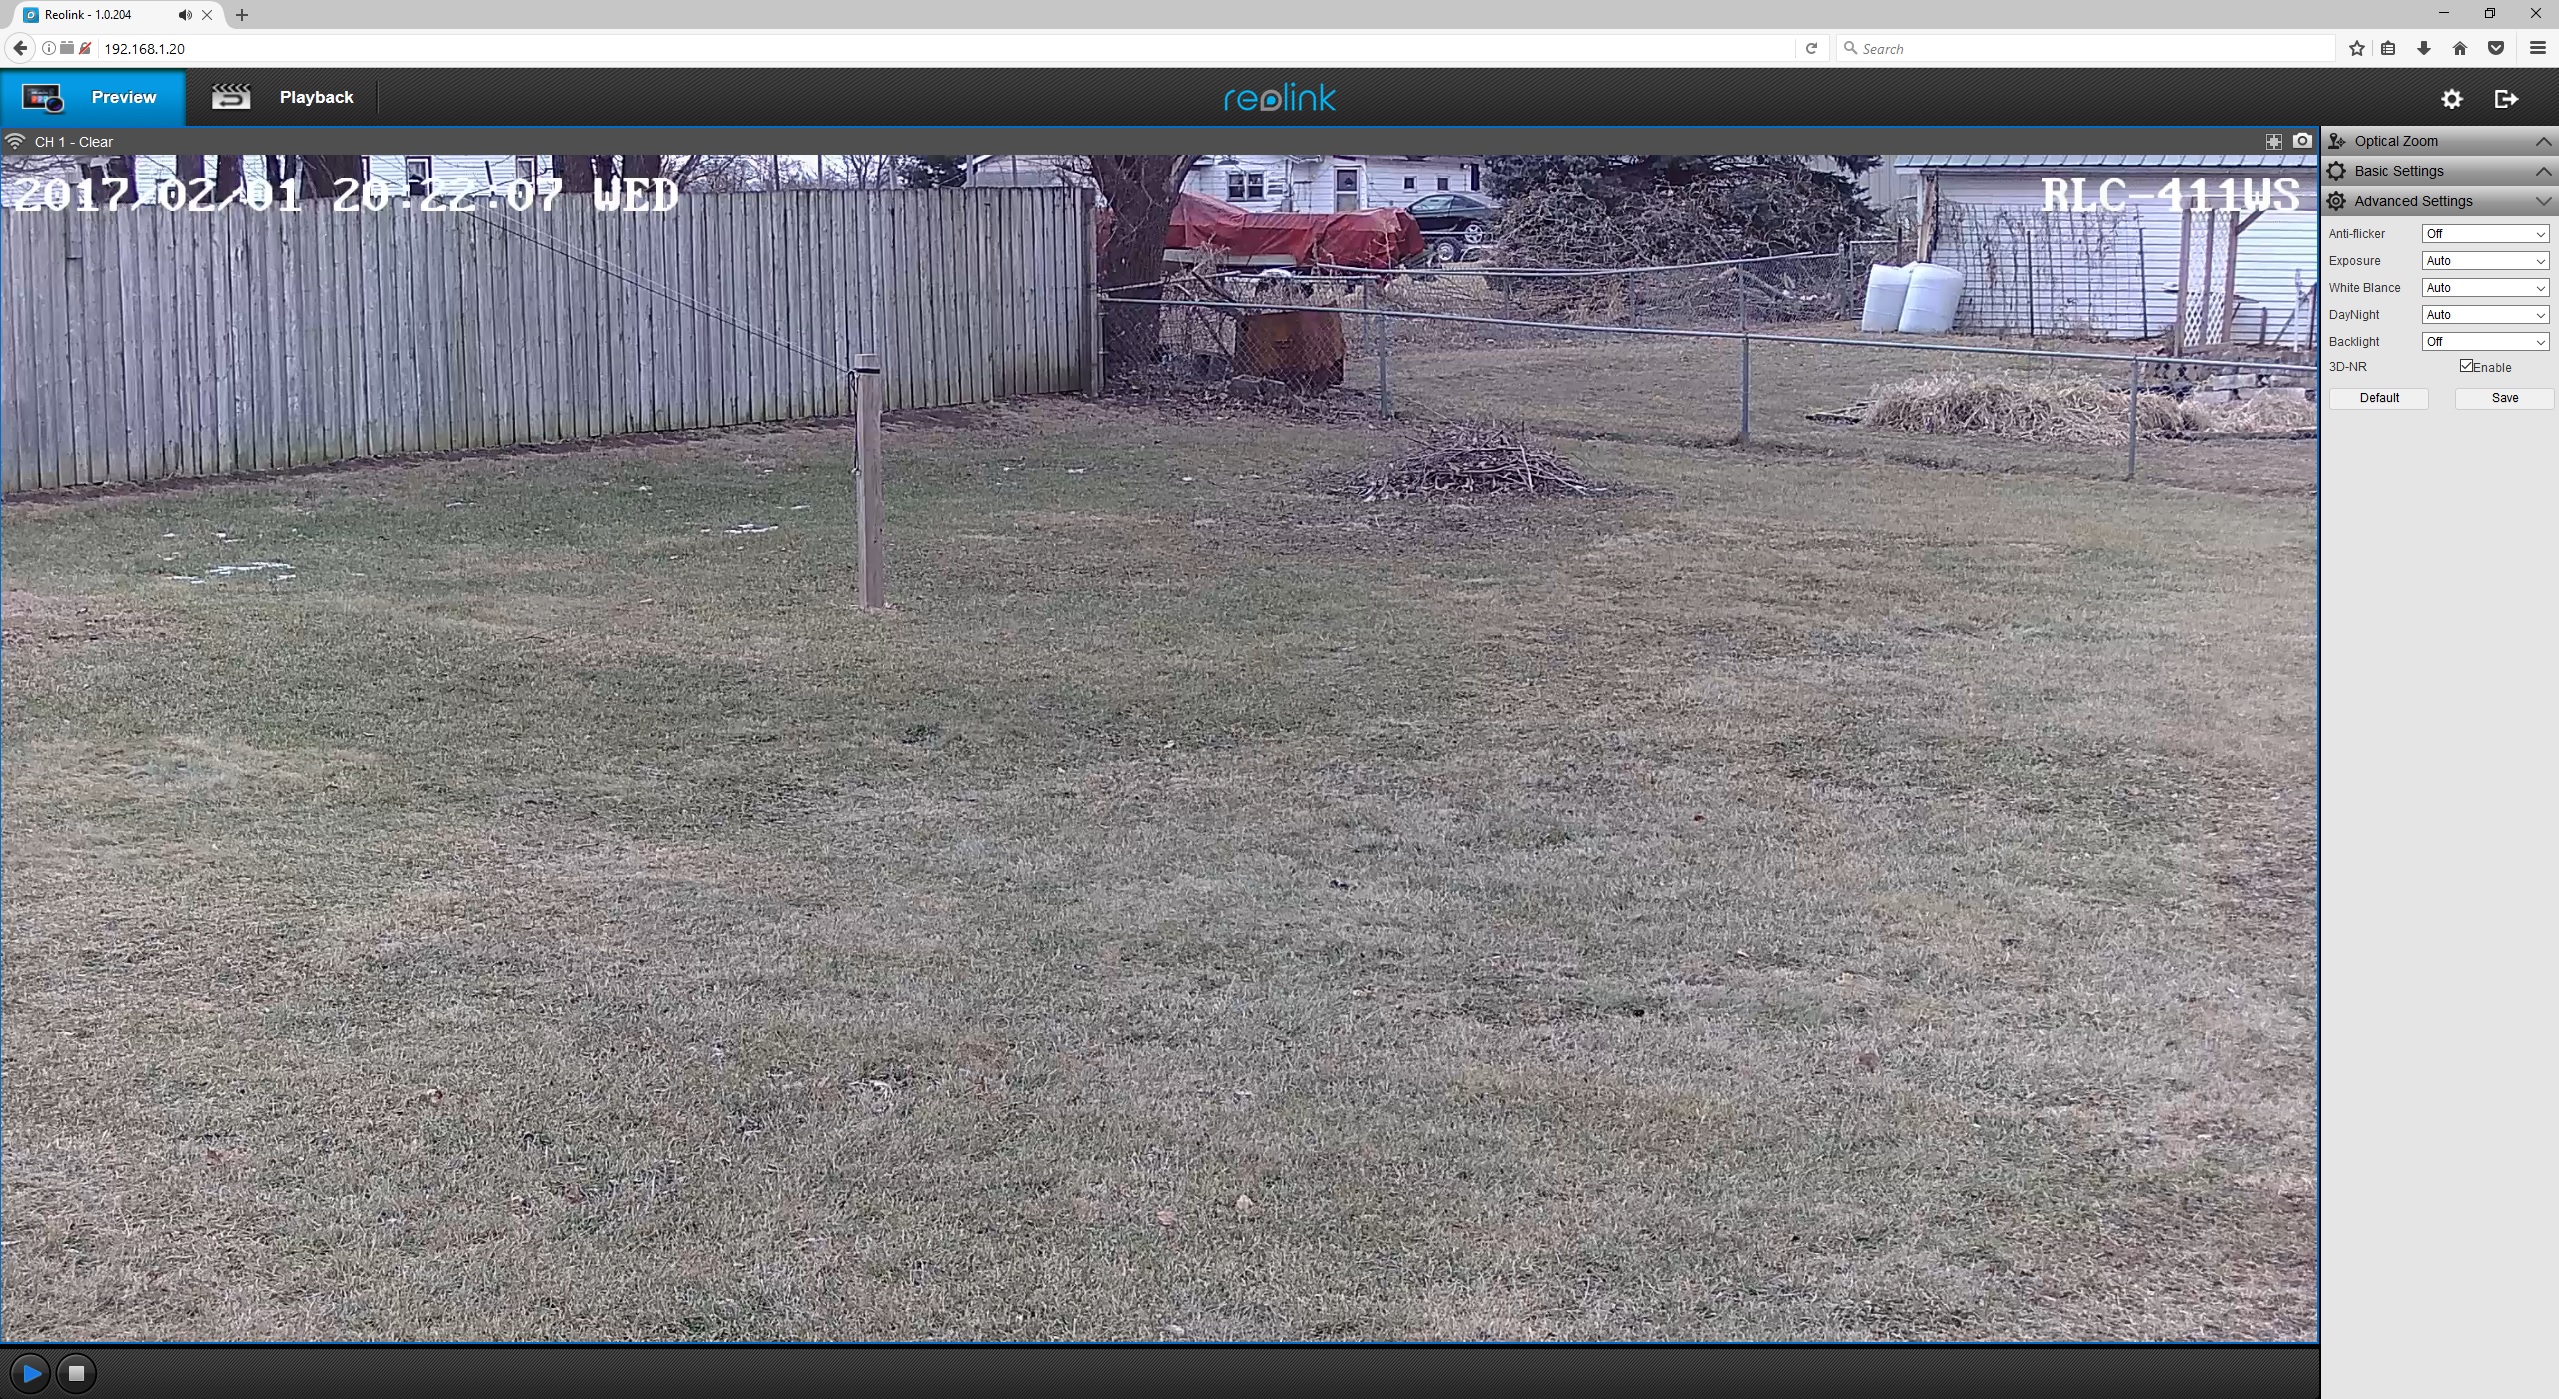
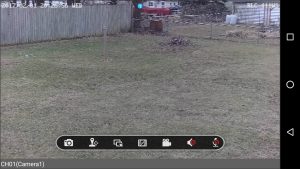
Using my Windows 10 PC I connected to the camera’s web interface using Chrome, Opera, and Firefox browsers. All three browsers worked fine but Adobe Flash Player is required in order for you to see the video stream. I also tried Microsoft Edge and it didn’t want to connect for some reason, and I didn’t look into it because I don’t normally use Edge anyways.
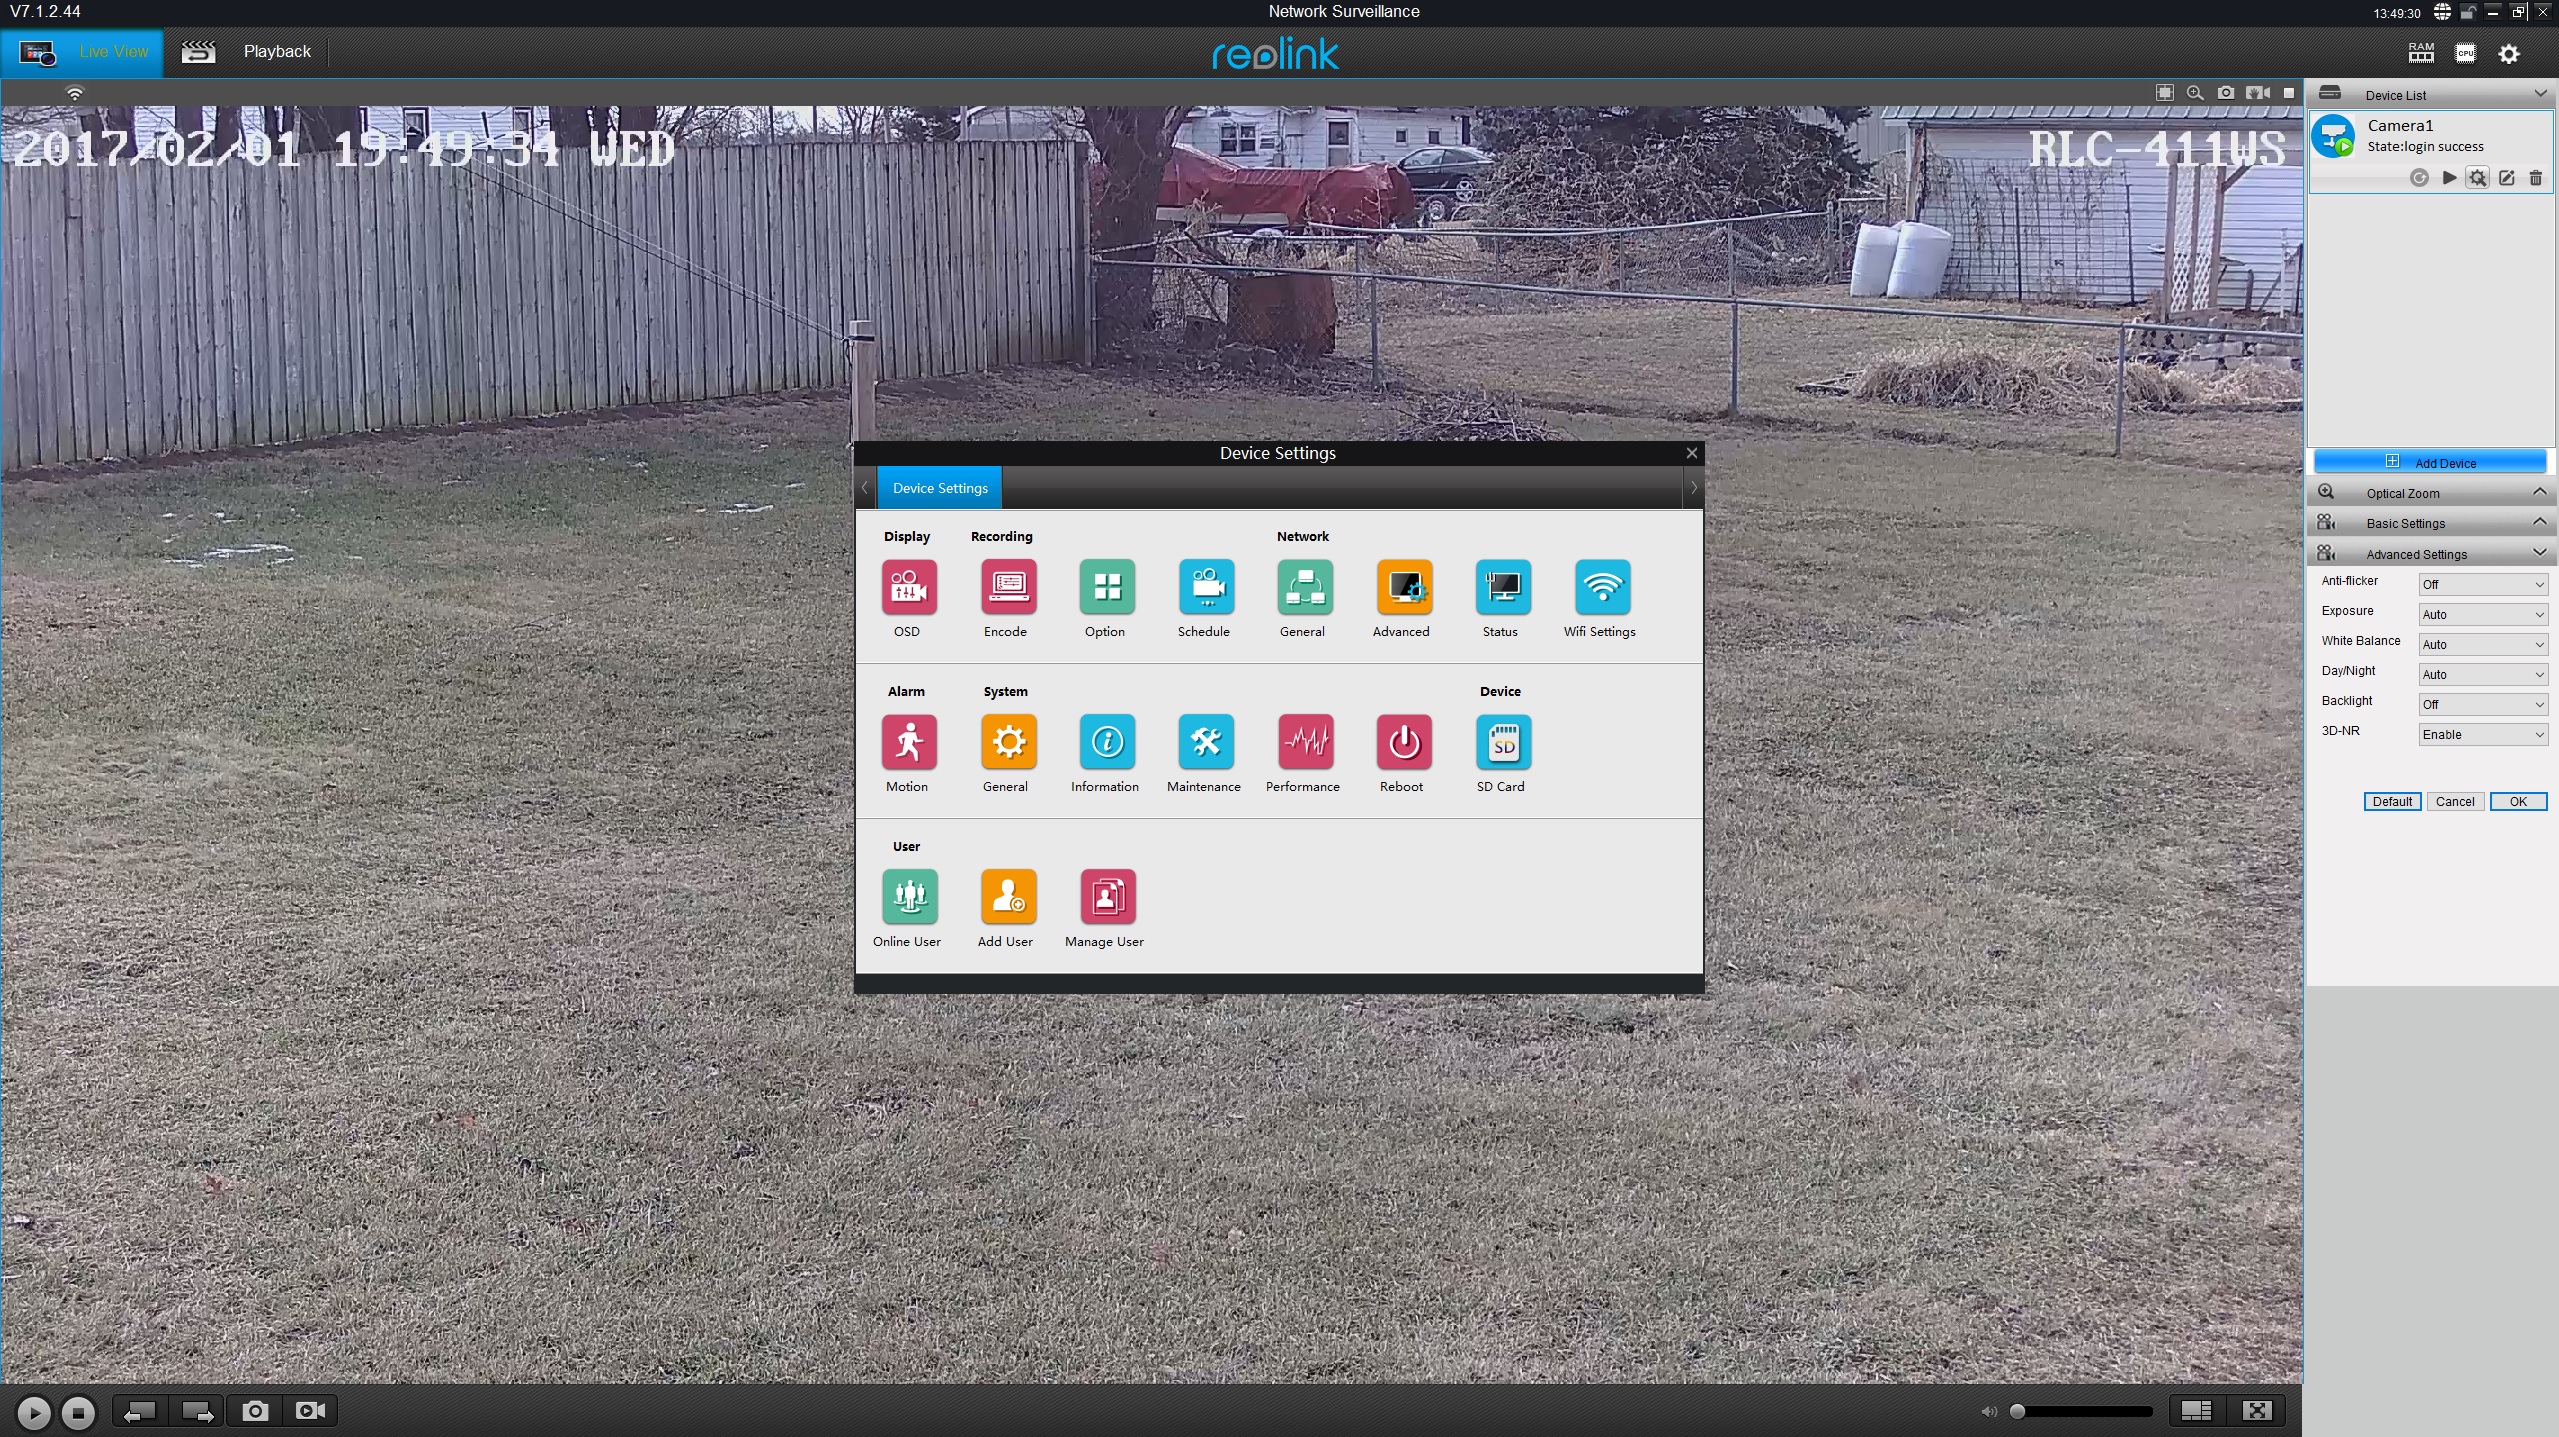
I also installed the Reolink application on my Windows 10 PC and that worked perfectly. Here’s a screen shot of the application with the main configuration screen open. This configuration screen looks a little different than the mobile and web apps, but it’s still very easy to use.
I was able to run the Android application on my smartphone, the Windows application on my PC, and also three web applications all at the same time while my server was recording the video stream from the camera, and the camera had no problems handling all of that at once. It seems to be very robust and easily able to handle multiple clients. The main thing I didn’t like about the software was that it requires Adobe Flash Player to see the video stream on the web client. This was no problem on my PCs, but is not an option on my Samsung UN40KU6300 smart TV. The TV has a web browser and can login to the camera just fine, but Flash Player is no longer supported on that platform, so you can’t get any video. Not a big deal to most people, but something that I experienced and thought was worth mentioning. I also used the web interface with Firefox on Linux Mint 18.1 and had no problems there.
Image Adjustments
I found that the camera settings worked well for me just as they came set from the factory. I did have a chance to try out the Backlight Compensation and Wide Dynamic Range adjustments, and they did a great job of compensating for overly dark and light areas when needed. All of the different applications are able to adjust the varifocal lens, but you have to get the hang of it to get it set at the exact point you want. In other words, getting it fully zoomed in or out is easy, but adjusting it to an exact point in between can be a little touchy. The PC client seemed to be the easiest to adjust. As with any varifocal camera though, you usually set this when you put the camera in place and then rarely change it again. They’re not designed to changed on a daily basis like a PTZ camera is. Another point to make is that you’ll want to adjust this during the day so the auto-focus will work well. You can do it at night but the low light levels will cause the auto-focus to hunt around, take a long time, and sometimes fail, requiring a second or third try to get it right. This is typical for any varifocal camera and not specific to this particular one.
Here’s a short video clip of me changing the lens from wide to fully zoomed while it was snowing out, all done from the PC application in the comfort of my home.
IR LEDs and Night Vision
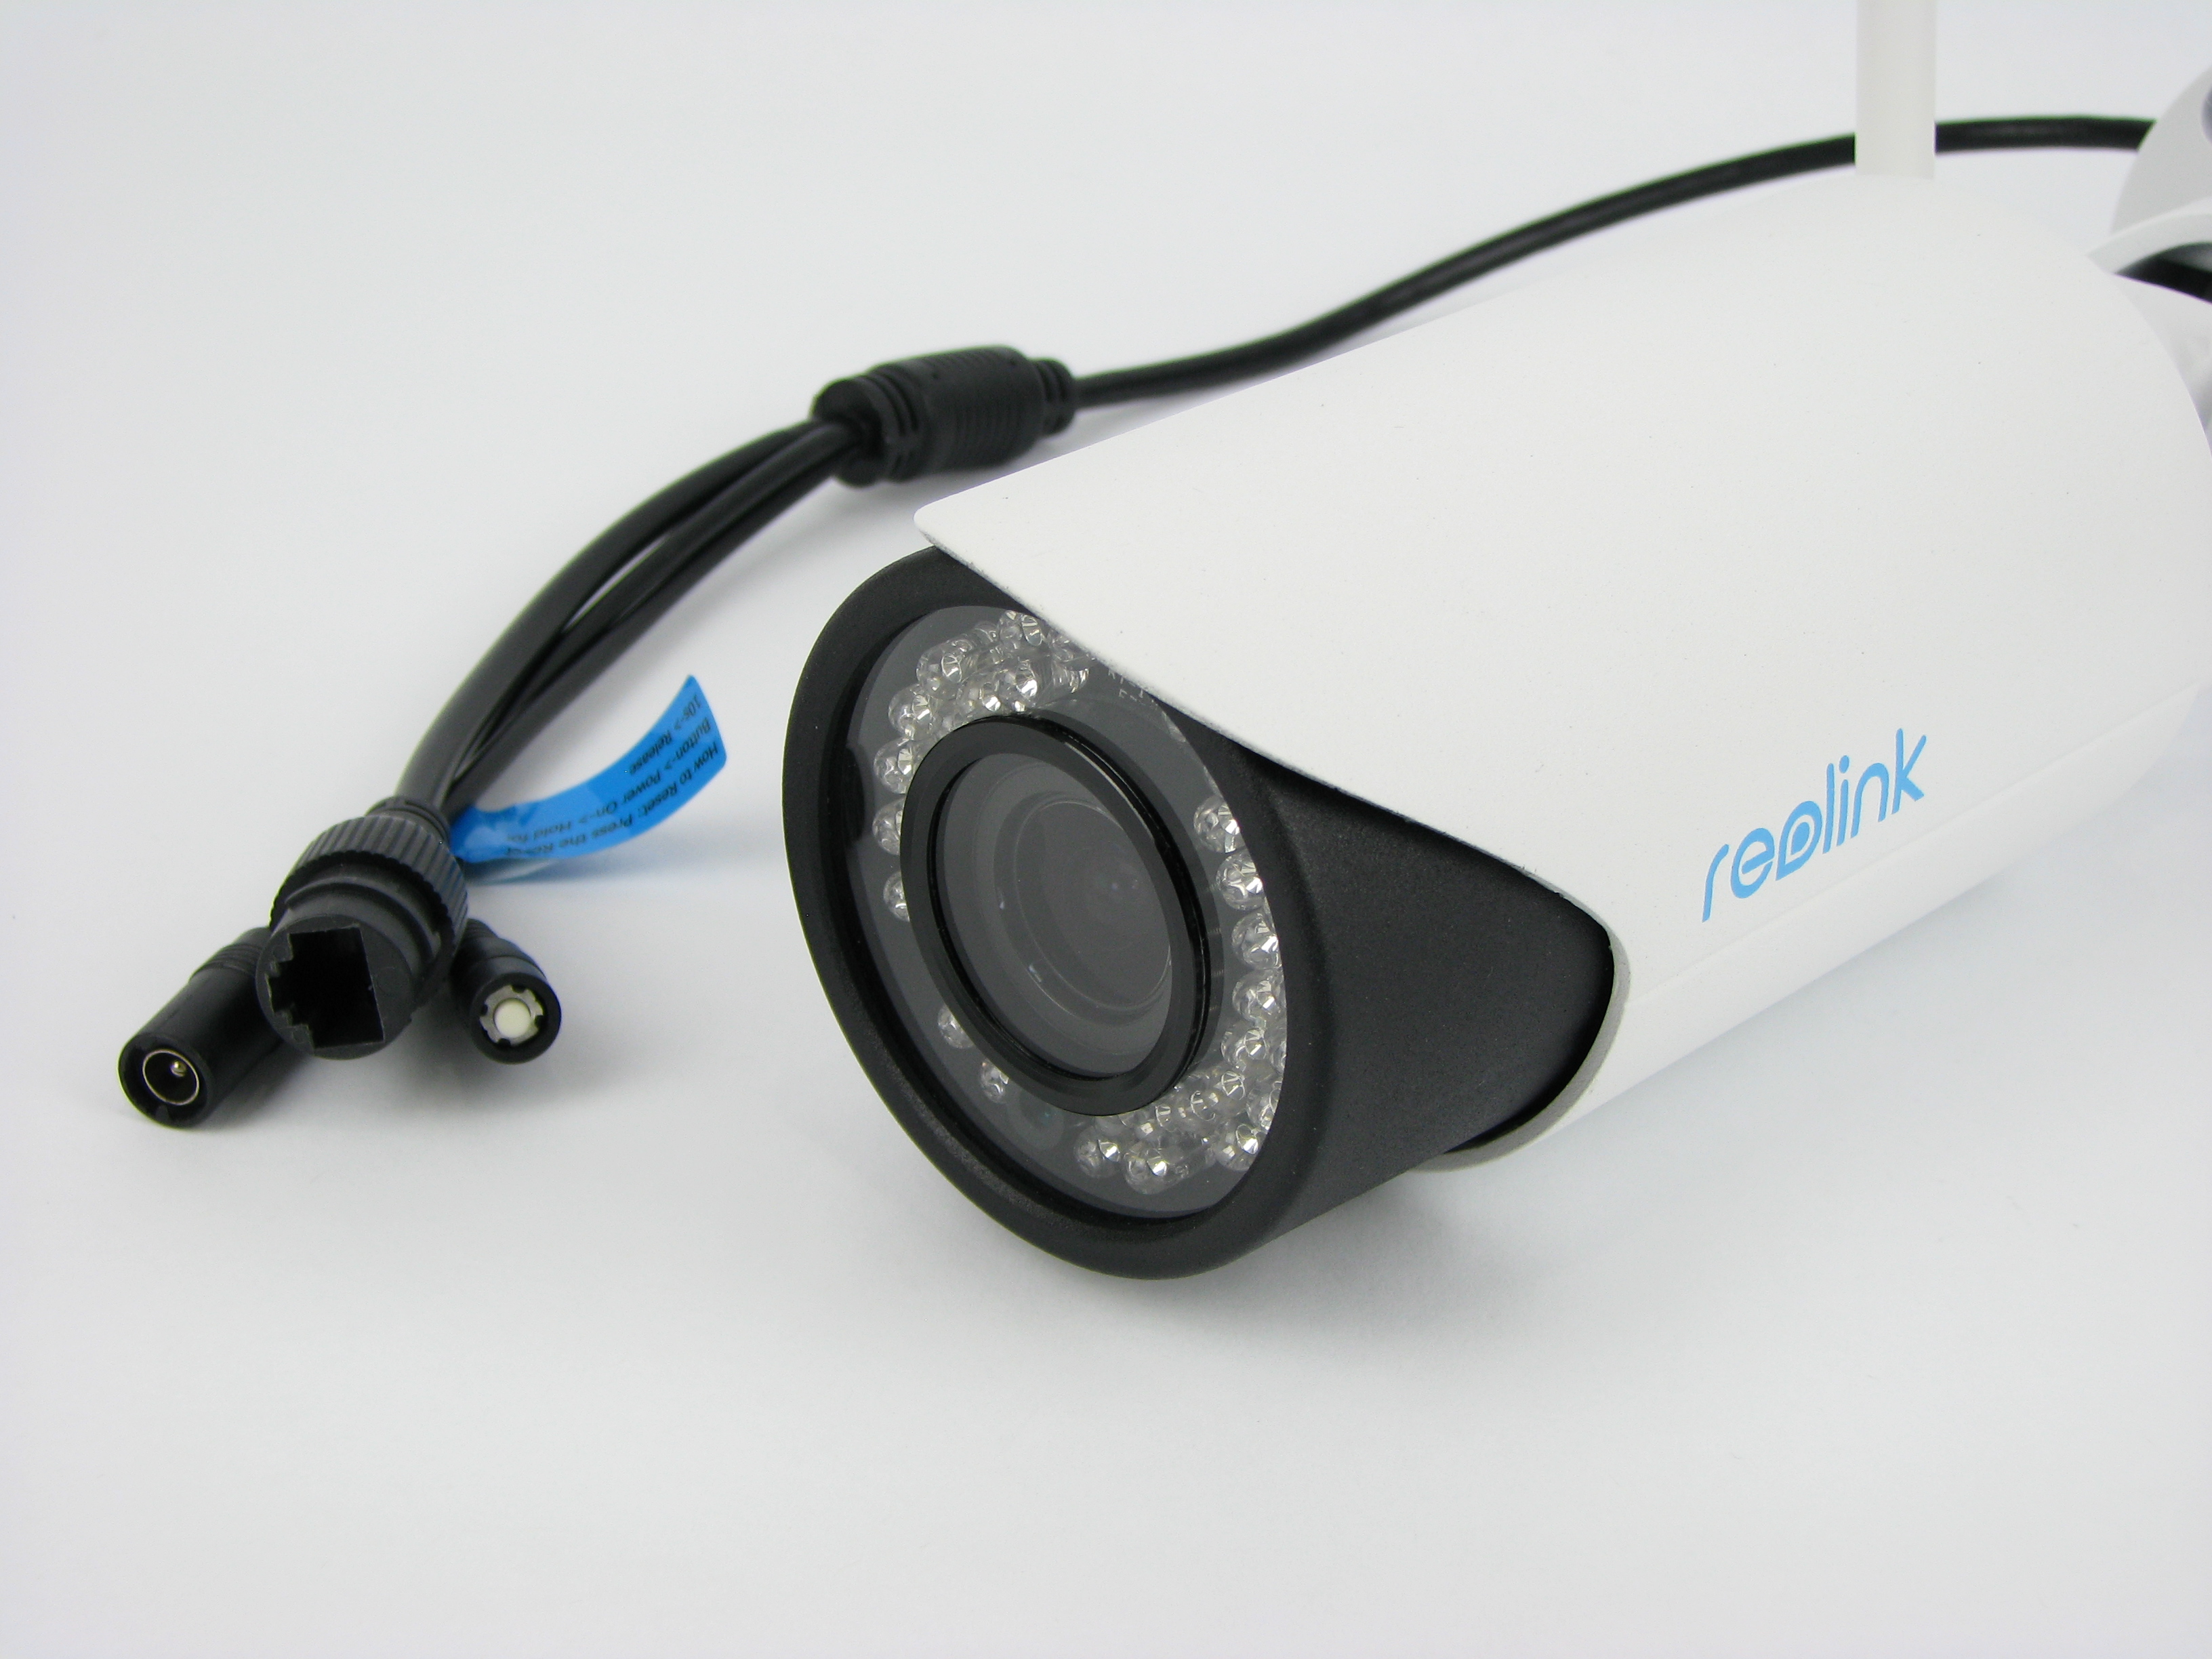
One feature missing with this camera is the ability to manually turn off the built-in IR LEDs. Hopefully Reolink will be able to add that feature in a future firmware version. Right now The LEDs are off when the camera is in day mode, and they come on when the camera switches to night mode. You can force the camera to be in day mode all of the time but that makes it essentially blind in low light situations or when using external IR illuminators. This photo shows the end of the camera’s cable, which has the Ethernet and power connections, and a reset button if you need to force a factory reset for some reason.
The built-in infrared source is a collection of small LEDs around the lens, with a rated distance of 30 meters or 98 feet. These are common on many cameras, and while the light intensity falls off fairly rapidly beyond half of the rated distance, this does provide usable IR light out to 100′. The light is nice and even, with great coverage in a flood pattern. It doesn’t completely fill the view when the camera is at full wide angle, and that’s completely normal.
This camera’s performance in low light is pretty typical and middle of the road for cameras available today. Not the best one that I have and not the worst I’ve seen either. It is fairly noisy in low light, causing higher bandwidth utilization than normally seen during the day. It also seems to hang on to color mode for a few minutes longer than I would like. That noisy color mode in the evening right before it finally switches to night mode really drives up CPU utilization on the camera. Hopefully Reolink will improve this in a future firmware update.
Internal storage and recording
This camera comes with a 16 GB microSD card in an internal slot. While Reolink advertises that it can be upgraded to 64 GB, they also do not recommend that end users attempt this because it requires disassembly of the camera. I did not attempt this and am not sure how to get it open off the top of my head. This internal card can be used to record video clips on motion detection during the days and hours that you want, and does not support continuous recording. I was able to save the recorded MP4 video from the camera to my PC and view it with no issues.
Wireless Performance
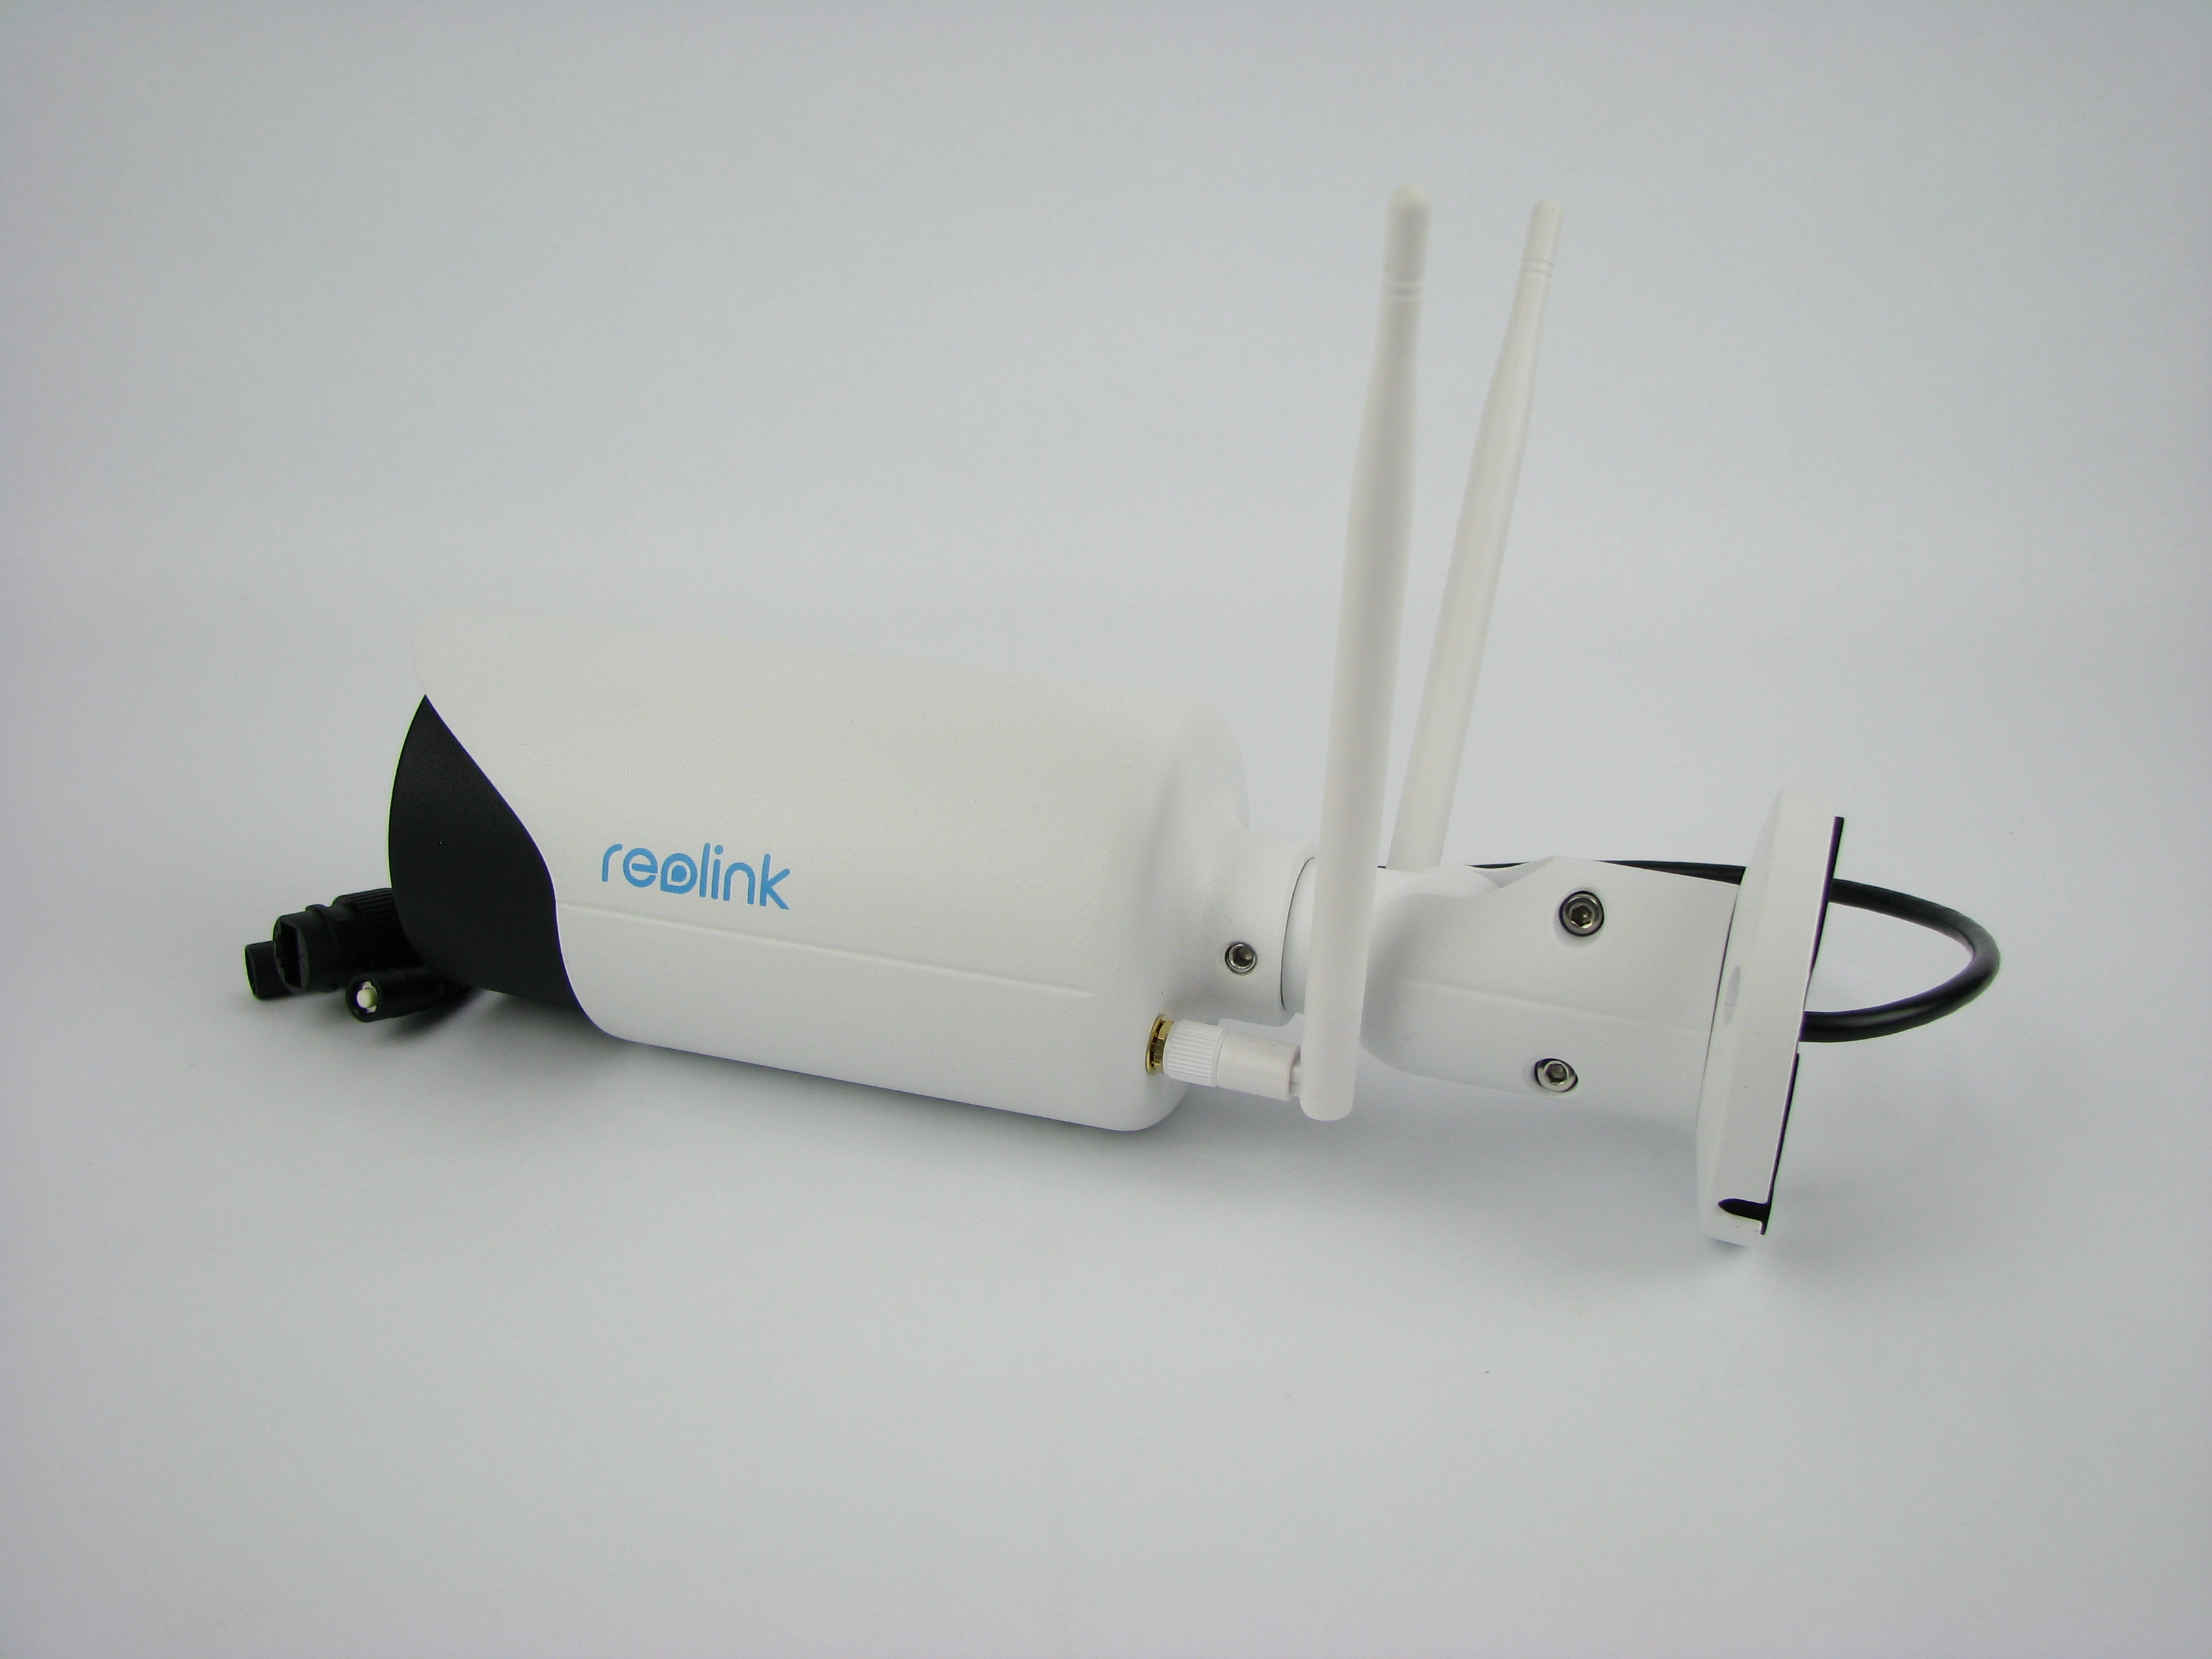
The RLC-411WS supports 802.11 a/b/g/n WiFi, with two antennas and up to two transmit and two receive streams on 2.4 or 5.8 GHz. I tried it on both bands with my D-Link DAP-2660 wireless access point and had no problems at all. It’s very easy to pull up a list of all available access points and change the wireless connection using any of the Reolink software applications. I was able to switch back and forth between 2.4 and 5.8 GHz on my access point with without any noticeable drop in connection or video. I did not test for maximum range but I still had 100% signal strength on both bands through an exterior wall with the camera over 20′ away from the access point.
Final Thoughts
I have to say that overall I really like the RLC-411WS. Reolink has managed to combine almost every possible feature into an outdoor camera with a rugged metal housing that’s easy to mount. I didn’t cover all of the different features of the software, but almost every common capability that I can think of is there. The physical capabilities are a great combination of IR night vision with an IR cut filter, varifocal lens, dual stream wireless that can operate on 2.4 or 5.8 GHz.
It’s too bad that the microSD card can’t be accessed easily, and most consumers are going to essentially be stuck with the factory 16GB card. Depending on how much activity your camera sees that could be anywhere from a number of hours, days, or even weeks of recorded video. It’s not really a concern to me because I record continuous video on an external server, and don’t rely on a cameras internal storage.
I also wish the camera was rated for temperatures below 14 degrees Fahrenheit. That may or may not be an issue to you, depending on your weather extremes. It also does not have a microphone or any ability to record audio, not a problem for most people with an outdoor camera.
It would be nice if the noise in very low light conditions could be improved, and also allow for manually controlling the IR light if needed. Considering everything that it does well, that’s a pretty short list of minor complaints. I didn’t run into any issues while testing and using it over the past few weeks that would keep me from recommending it to anyone.
Click here to view the Reolink RLC-411WS at Amazon!
Here’s a short video of our dog in the snow during the day.
How did the zoom work, would you be able to read a license plate across the street
The zoom is used to set the field of view that the camera is looking at. Zoomed out for a wider area with less detail, or zoomed in for a more narrow area with greater detail, and anywhere in between that fits your installation needs. Whether you can read a license plate at a given distance depends on many factors. You might try this free online tool to get an idea if it will do what you want. You can select your location, add a camera, and try different zoom levels at various distances. That Reolink model is one of the available cameras to choose from so it should tell you all you need once you get used to the tool. https://calculator.ipvm.com/
The year is now 2019, month is September and Reolink “smart” cameras still insist on using Flash to display their OSD. How pathetic of Reolink!
I have a NAS Router which shows video using plain HTML5 and an inbuilt player with controls, ReoLink says they are cutting edge, what a joke! Seems like they don’t fix things that really matter to users, only tinker around the edges.
Hi John,
I have to agree that camera manufacturers seem to be behind the times when it comes to things like that. Hikvision still requires an NPAPI plugin to display video in a web browser as far as I know, and these plugins aren’t supported on many browsers anymore like Chrome.
Steve
I know this is an old article from 2017. I purchase same camera during that year and am just now installing. (Don’t ask). Every thing about this camera is as you described except for one thing: I cannot get it to hook up to WiFi without the ethernet cable. This pre-empts me from making adjustments because I cannot see it on the monitor/phone app live. It records beautifully. I have been playing back all of the recordings as I have been trying to make this final step. No live visual. Reolink provides good instructions. Have contacted their support team who keep asking me questions and directing me to various links but provide no answer to the problem. WiFi test fails. My router is a good one, with right specs according to their links. Direct connect is OK but disconnect ethernet directly and no visual monitoring at PC or android app. Any ideas other than talk to support tech? Thank you for your time.
Hi Pete,
I don’t have an answer for you off the top of my head, but I do still have that camera sitting here and haven’t used it since I wrote this article.
I will try to find time this weekend to see if I can duplicate what you’re seeing, and hopefully find some useful information that can help you.
Update – I powered up my RLC-411WS and did a factory reset. Then I was able to to connect it to my network over 2.4 GHz or 5 GHz WiFi, and view and adjust the camera, all without ever plugging in the wired Ethernet cable. That was all done with the Android app on my phone, and then I installed the Windows client on my PC and was able to access the camera over WiFi.
Not sure what might be giving you trouble, but you might try a factory reset with the Ethernet cable unplugged, then add it to the Reolink app and try to configure a Wifi connection to your router. Sorry I couldn’t be of more help.
Steve